|
| Closeup of drawer and new knob. |
|
|
Recently, I've just done a fun makeover on a client's existing piece of furniture, trying to replicate the look of a fabulous bone/ivory inlaid Moroccan style chest, which I thought would be a great Metamorphosis Monday (at
Between Naps on the Porch) post. The client owned an existing chest in the correct size for their foyer, but the dark mahogany finish on the sturdy imported dresser was much too casual and, quite frankly, boring to carry the entry:
 |
| The chest before. |
|
|
|
|
An inexpensive piece from the client's previous home, it was in good shape and the right size for the space, but the homeowners wanted something more exciting, something more like this fabulous chest from Wisteria:
While Wisteria's price ($2,995) is fair for such an intricate and decorative piece, with a new house to furnish, the clients preferred to make-over their existing chest and use that money elsewhere. Since the chests were of such similiar proportions, I was confident that I could mimic the feel of the bone inlaid chest with black paint and white stenciling.
Before I show process pictures, though, a note about using inspiration. I knew from the beginning that I could replicate the feel of the Wisteria chest, but I knew that I could not completely replicate it. First, and most importantly, the existing chest, while almost exactly the same dimensions and with the same drawer layout, was not as finely made or proportioned as the Wisteria one. If you look at the above photos, you'll see the client chest has large bulb feet and thick, almost crude, moulding around each drawer rather than being flat fronted as the Wisteria one. Secondly, the piece will get heavy use in the entry, so I decided to use oil-based products for durability: that meant I would not be able to get as fine a result with the stenciling, and that I could not use my latex mother of pearl glaze over the white stencils. Therefore, from the beginning, I decided to go for a more rustic, aged approach rather than a direct copy.
1. First step: Clean thoroughly, lightly sand, and apply a good quality adhesive primer. Adhesive primers are designed specifically to stick to glossy, previously finished surfaces such as furniture and cabinets. They adhere so well that there is no need to strip the previous finish...just rough it up slightly. Since I was painting the chest black, I had the paint store add black pigment to the primer to get it to as dark a grey as possible to make the painting process easier. Because of the dark primer, I was able to achieve full coverage with only 2 thin coats.
2. Paint it black. Use multiple thin coats instead of one thick one, and lightly sand between each coat with extra-fine steel wool---it does make a difference.
3. Add your white details with stencils and brushes. Since I was going for a rustic look, I didn't tape the moulding. However, taping would be needed if you were going for a crisp, inlaid look.
4. Apply finish if needed. I often find that if I use oil paint and sand the topcoat thoroughly with extra-fine steel wool, no additional finish is needed. But in this case I wanted my finish to achieve two things--give a translucent finish to the white details to suggest bone and to add the look of age, so after polishing the chest with steel wool, I brushed on and irregularly wiped off wood stain to finish.
 |
| Detail showing mottled effect achieved by stain top coat. |
5. Add co-ordinating knobs. To finish, I replaced the existing pulls with new knobs with an aged ivory look. I did retain the original back plates for a more finished look.
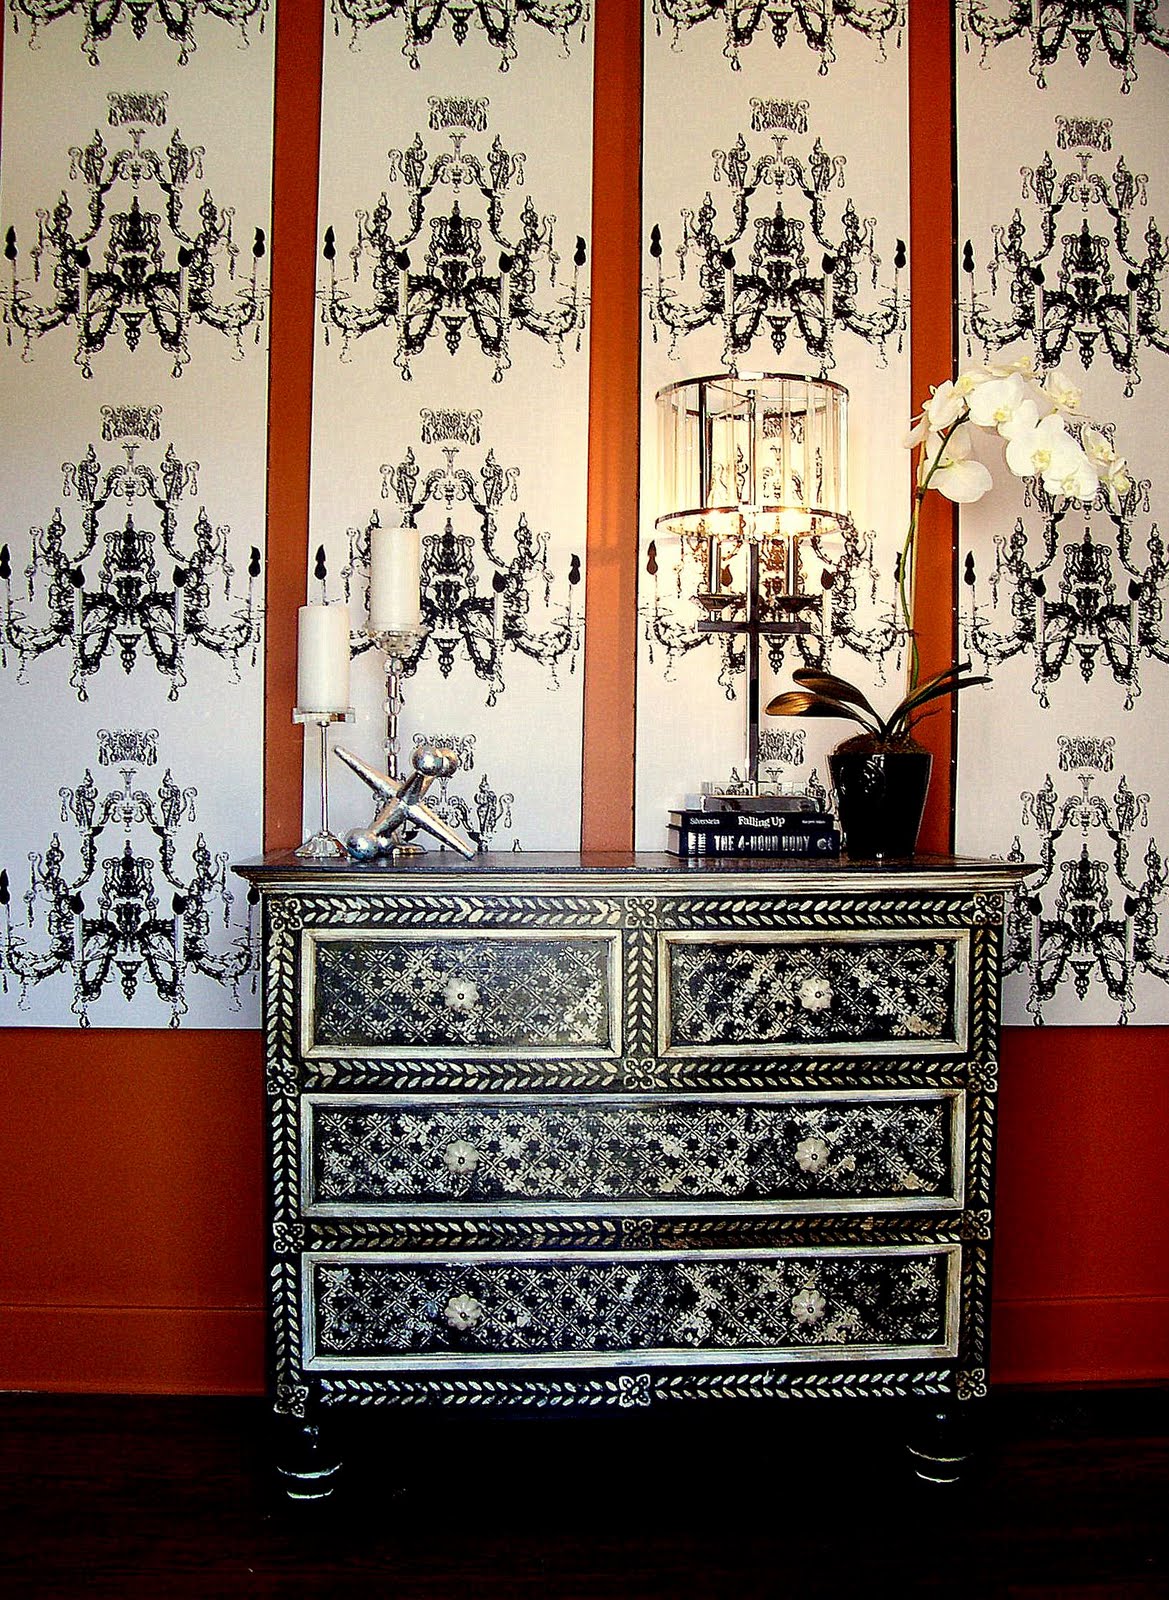
After, and ready for delivery. When the foyer is finished, I'll do a follow up post.
To Recap:
 |
| Before |
 |
| Inspiration |

After